Blog

  • No Kings Jack-o-Lantern in 4 Easy Steps

    No Kings Jack-o-Lantern in 4 Easy Steps

    No Kings

    For Halloween this year I was inspired by the “No Kings” protests to incorporate the iconic design into a decorative illuminated gourd. I was pretty busy so didn’t get around to this carving project until yesterday, but with the steps I’ve outlined you will be able to create your own “No Kings” pumpkin next year!

    The Template

    First I drew a template. I used Pixelmator Pro (my preferred non-Adobe image editor). I made sure to keep thick (1/2” to 3/4”) “bridges” between any “islands” so that the final product would have structural integrity.

    Below is a JPG version of the template–feel free to re-use it, or use it as inspiration for your own template!

    No Kings printable stencil

    The Process

    I printed the template out on a standard 8.5” x 11” piece of white paper, then using scissors I cut out the black parts. I overlaid the template over the pumpkin and held it in place with painters tape. This part takes a little finesse because a flat sheet of paper obviously doesn’t fit perfectly against a curved surface.

    No Kings template cutout and overlaid on the pumpkin

    I found it necessary to tape a few points (top, bottom, left, right) to keep it in place. Using sharpie I did my best to trace the outline of the cutout–occasionally adjusting the placement of the template to accommodate the pumpkin’s curvature. I removed the template, and touched up some of the lines so that it looked pretty good.

    No Kings stencil transferred to the pumpkin

    Then I took a handy pumpkin carving tool (a long, slender serrated blade) and began cutting out the outlined shapes. I started with the delicate interior parts first and worked my way outward to the slash, and finally to the two halves of the circle. The pieces came out with no problem, and I used a moist paper towel to wipe up the random bits of pumpkin pulp left by the carving tool. I used a little rubbing alcohol on a paper towel to wipe up the edges of the cuts where some of the black ink was still visible.

    No Kings pumpkin final carving

    That’s it! I didn’t spend any time trying to fine tune the cuts–it looked pretty good and I didn’t want to risk the structural integrity of the design. I popped a rechargeable LED light inside and set it out on our front steps and admired my work!

    Happy Halloween and No kings!

    No Kings jack-o-lantern illuminated at night

    About the Author

    Nicholas Hart is a software engineer and technical writer passionate about sharing knowledge and helping others learn. You can find more of my work at:

  • My Job Search at 50+: The Data Behind Landing a Tech Job in 2025

    My Job Search at 50+: The Data Behind Landing a Tech Job in 2025

    Author: Nicholas Hart
    Date: Thursday, October 16, 2025
    Reading time: 8-9 minutes


    Tech Job Seeking in 2025

    After 8 months and 90 applications I finally landed a job! I have never experienced a job market this tough during my whole career in software engineering–either as an individual contributor or manager. Anecdotally I see a lot of posts on LinkedIn about people struggling with the job market. I’ve never been out of work more than a month or so until now. It feels like this period in 2025 is different.

    What’s different? Is it a realignment within tech spurred by AI and shortsighted tech CEOs chasing after more profit? Is it the fact that I’m over 50? Perhaps a bit of both. I don’t have all the answers, but I will share my data and offer some advice.

    My Data

    My job search visualized

    I submitted 90 job applications over eight months.

    • 5 Director of Engineering
      • 1 interview (via referral) – 20% interview rate
      • 3 ghosted – 60% ghost rate
      • 0 pending
    • 25 Senior Engineering Manager
      • 3 interviews (1 via recruiter, 1 via referral) – 12% interview rate
      • 3 ghosted – 12% ghost rate
      • 2 pending
    • 37 Engineering Manager
      • 9 interviews (1 via recruiter, 3 via referrals) – 24% interview rate
      • 7 ghosted – 19% ghost rate
      • 8 pending
    • 2 Software Architect
      • 1 interview – 50%
      • 2 ghosted – 100% ghost rate
      • 0 pending
    • 11 Staff/Principal/Founding Engineer
      • 0 interviews – 0% interview rate
      • 5 ghosted – 45% ghost rate
      • 5 pending
    • 7 Senior Engineer
      • 0 interviews – 0% interview rate
      • 0 ghosted – 0% ghost rate
      • 3 pending
    • 3 Engineer
      • 0 interviews – 0% interview rate
      • 0 ghosted – 0% ghost rate
      • 1 pending

    (A note on the numbers above–I still have 19 applications that have received no response yet, but I haven’t moved to ghosted yet, so those ghost rates may still go up!)

    In total, I landed 14 interviews from these 90 applications–a 16% conversion rate.

    It definitely helped to have a referral, although the job I ended up getting came from outreach from a recruiter. One other promising opportunity which I withdrew from (after receiving the offer I accepted) also came from a recruiter. The difference between these opportunities and all the others were that the recruiters were engaged, transparent, communicative, responsive, and reliable.

    One of the opportunities I was pretty excited about, but the recruiter took weeks to get back to me after completing a final round of interviews. They repeatedly promised dates by which they’d have news, and when those dates passed without communication I would follow up after several days and get put off another week. It was very frustrating and eventually led to a rejection when I let them know I had another offer.

    A few opportunities had a significant “homework” aspect–a presentation to create and present, or a take-home coding project. I probably spent too much time on these projects–I never got to a final round of interviews for any of them.

    One that stung was an Engineering Manager role at a Seattle startup whose mission I was really excited about. They wanted a very hands-on manager and had me do a coding test, which I bombed–not because I’m a lousy engineer, but because I’m not a seasoned React engineer–I still look things up and rely on examples. It also didn’t help that I was told the coding would be focused on Typescript–which I am much stronger at.

    I was rejected out of hand by a recruiter for one role that I was referred for by a former employee. It seems they were looking for someone with 8 years of hands-on React engineering experience. I almost wrote a blog post about this one. React 8 years ago looks nothing like React today! Any talented engineer can pick up a new technology. Setting arbitrary requirements on experience means you’re going to miss out on smart, motivated, experienced talent. Their loss!

    My New Job

    The role I ended up accepting is a Senior Engineering Manager role–which was my prior title at Sonos. The comp ended up being pretty close too. One of the huge bonuses is that the role is 100% remote. I won’t waste several hours of my time each week commuting to an office. I’ve demonstrated the ability to successfully lead distributed and remote software teams and am excited I get to continue to do so. (Here’s me thumbing my nose at all the “return to office” deadenders who argue this is the only way to go.)

    The astonishing thing about this job is that the recruiter found me and reached out. Their posting had escaped my job search. I’m still curious to know why they reached out to me among a sea of candidates. I have no illusions about being well known, but I like to think I have a reputation among those who know me as a manager who does right by his employees (I always had above-average engagement scores from my teams at Sonos). When I’m on-site for orientation I hope to ask the recruiter about why I stood out.

    Apply Early and Often

    I was more likely to get traction on an application if I applied within a few days of the role being posted. Recruiters are overwhelmed by bot applications and genuine candidates are getting lost in the system. When searching LinkedIn make sure you look for posts within the past week (at most). Create job searches for roles posted in the past 24 hours and set alerts–when a new role of interest drops prioritize it, don’t wait!

    (Sorry I wish I had kept more data on the age of job postings that I applied to!)

    Focus on quality over quantity. You might want to have a few slightly different resumes–especially for a manager or senior engineer who is capable of leading in more than one specialization. Re-read and tweak your resumes–you may figure out some ways to improve them over time. Over the months I evolved several versions of my resume: mobile engineering leader, full-stack engineering leader, and staff engineer/architect in mobile.

    I made sure to craft a personal cover letter for each application. Over time I evolved this process as well, so that I had a standard template for a manager or staff engineer role–a couple of concise paragraphs that tell a story about my technical and leadership expertise. Then I’d write a custom intro paragraph that had some sort of hook that connects me to the company and the specific role. I might tweak the other standard paragraphs if there was a particular aspect of my experience worth emphasizing.

    I aimed for 2-4 quality applications per week. If I couldn’t see myself connecting to the role in some way and write an intro paragraph for a cover letter, then I simply passed on it. There are certain toxic companies (including several of the FAANG) that I simply avoided–personal preference as well as disrespectful past interview experiences. Perhaps this also reflects upon my over 50 attitude–I’ve done jobs for a paycheck before and at this point in my life finding a meaningful opportunity is of critical importance to me.

    Keep the applications going, even when you’re interviewing. You want to keep your pipeline full, even if you made it through the final round for your dream job. They might pick someone else, and when you need a paycheck you can’t afford a lull in the job search process.

    Referrals Are Key

    Work your network. Reach out to former colleagues, friends, and family and get those referrals in. It helps! I had the best luck getting an interview via connections that I knew well. Those 2nd degree connections, not so much. Be sure to connect with people you’ve worked with, and don’t just slide into their DMs with “hey remember me from 10 years ago when we occasionally were in the same meeting? Could you refer me please?” Put in some effort, re-establish the connection, find out how they’re doing–ask about the company and if they have any insight. Build genuine connections and referrals often follow naturally.

    Sometimes the job posting on LinkedIn has a recruiter or hiring manager you can reach out to. I tried this a few times and never got a response, nor an interview. They’re probably inundated with requests. It probably doesn’t hurt your chances, but don’t toss some clearly AI-generated message their way, or a form letter with misspellings. I think the thing here is to come across as a real human, with some sort of connection to the role that will make them want to bother fishing your application out of the thousands in their system and give it a look.

    Job Searching Over 50

    I’m afraid I don’t have any data here, just anecdotes from LinkedIn (I sure see a lot of people talking about ageism), and my own experience. My best advice is:

    • Remove work experience older than 20 years from your resume. Chances are it’s not relevant to what you’re doing today and it’s taking up valuable real estate.
    • It’s ok to leave the graduation date off your education.
    • Actively learn new technologies and practice your coding skills. It’ll help with your interview conversations and look good on your GitHub profile.

    Keep Your Skills Fresh and Relevant

    One of the things that kept me going was working on personal projects–many of which I made public. I have no idea whether this factored into getting hired or not, but if a recruiter or hiring manager bothered to look at my GitHub profile they would see that I am writing code and learning. Plus if anyone wanted to drill in to my projects they’d see well-organized code with tests and automation. This regular practice will also help in interview conversations and technical screenings.

    Expect to be Ghosted

    Kudos to the recruiters who took the time to reach out with a personal message. I know you’re swamped! When I get a personal response, that is a company I will want to re-apply to someday. It’s nice even to get the automated rejections so I can cross one off my list. Applications that linger in limbo with no response are frustrating, but the reality is that many of one’s applications will never get an acknowledgement beyond the initial automated “thanks for your application” email. If it has been more than 4 weeks with no contact I move an application to the “ghosted” pile and move on.

    Keep Your Chin Up

    This process is demoralizing, frustrating, and filled with disappointment.

    • That role you thought you were perfect for and got an automated rejection…
    • The interview loop you thought you nailed but they’re moving forward with other candidates…
    • The recruiter you had a promising conversation with and never heard from again…

    I see a lot of people posting a lot of negativity on LinkedIn about how broken the hiring process is, how frustrated they are, how unfair it all is. I see the recruiters who are frustrated and overwhelmed too. The thing is, I don’t think posting negativity is going to help you in the long run. I do enjoy reading some of the more creative and humorous posts about how rough the job search is, and I hope it works out for them!

    If you’re an engineer my advice is to keep busy, show off what you’re building, put a positive spin on your public posts, and find some friends and family with whom you can commiserate with privately.

    This is all my own data, personal experiences, observations, and advice. I hope others find it helpful. Your mileage may vary.


    About the Author

    Nicholas Hart is a software engineer and technical writer passionate about sharing knowledge and helping others learn. You can find more of my work at:

  • The 15-Minute iOS Project

    The 15-Minute iOS Project

    👋 Introduction

    For the past several months I’ve been building personal iOS apps to
    keep my skills current during my job search. I’d like to share a tool
    I’ve built that makes setting up a professional-grade iOS project take
    only minutes.

    🕐 The Time Saving Inspiration

    In the past when working on personal projects I tended to use a
    simple Git repository and do everything manually. It worked ok, even
    though sometimes in my excitement to push I’d forget to run the unit
    tests. However, once you’ve lived with professional automation that
    enforces code quality it is hard to go back. It’s such a huge
    productivity boost and helps prevent one from making simple mistakes and
    speeds up one’s development process.

    However, I’ve found myself spending valuable time building out the
    same automation frameworks and tooling each time I set up a new iOS
    project. Setting up a project with CLI scripts, linting, code
    formatting, GitHub CI, and all the configuration files that make for a
    professional-grade project used to take hours of time. Last weekend I
    spent part of a day with Claude Code and came up with a GitHub Template
    Repository called SwiftProjectTemplate
    that aims for zero-configuration setup of new iOS projects, complete
    with GitHub CI workflow, code lint, code formatting, and build and test
    automation.

    🧰 The Professional
    iOS Developer Tech Stack

    There are certainly many ways to configure and organize a
    professional tech stack for iOS development. Below is what I prefer to
    use, and it is definitely CLI-centric. It might not be for everyone,
    especially if you prefer GUI dev tools.

    📂 File Structure

    My biggest pet peeve about Xcode’s new project wizard is that it
    gives you a really basic folder structure. A good iOS project has
    well-organized folders for keeping files together. SwiftProjectTemplate
    is very opinionated about using the MVVM
    pattern and automatically sets up a directory structure for you like
    so:

    MyAwesomeApp/
    ├── MyAwesomeApp/
    │   ├── Models/              # Data models and Core Data entities
    │   ├── Views/               # SwiftUI views and UI components
    │   ├── ViewModels/          # Business logic and view state
    │   ├── Services/            # Network, persistence, business services
    │   ├── Extensions/          # Swift extensions and utilities
    │   └── Helpers/             # Helper functions and utilities
    ├── MyAwesomeAppTests/       # Unit tests (mirrors main structure)
    ├── MyAwesomeAppUITests/     # UI tests
    └── scripts/                 # Development automation scripts

    🍺 Homebrew

    I rely on a bunch of tools from Homebrew to keep the project organized and
    the code clean. Using a Brewfile allows one to easily
    specify the required tools and install them.

    ⚙️ XcodeGen

    My biggest frustration with Xcode has always been its project format.
    Merging changes from multiple users can be a serious pain, and if you do
    it wrong you can lose files or make the project file unreadable. XcodeGen solves that by
    using a simple YAML project.yml configuration file to
    automatically generate the Xcode project.

    🎨 SwiftFormat

    Everyone has their code style preferences. SwiftFormat
    allows one to configure how code should be formatted, and check/enforce
    the code style. It can also fix simple formatting issues around
    structure and spacing.

    🔍 SwiftLint

    A related tool that helps enforce consistent syntax and best
    practices is SwiftLint.
    This tool allows one to configure standards for code syntax, clarity,
    complexity, and consistency.

    ✨ xcbeautify

    As a power command line user I appreciate readable output and logs.
    Xcode is quite verbose and xcbeautify helps
    make the copious Xcode build and test logs more user-friendly.

    📄 yq

    My preferred format for configuration files is YAML, which is just as expressive as JSON
    but a little easier on the eyes for us humans. The CLI command yq is a powerful tool for
    parsing YAML files and pulling data out of it so you can supercharge
    one’s scripts and automation.

    🦾 GitHub CLI

    GitHub provides a powerful command-line tool called gh for interacting with GitHub. I find
    it particularly useful for automating GitHub actions, debugging, and
    resolving errors in one’s CI workflow.

    📝 VSCode + Markdownlint

    I tend to use VSCode for
    all of my coding/editing beyond Swift and Xcode. It is a lightweight IDE
    that has a ton of functionality and extensions. The markdownlint
    extension makes editing Markdown easier by highlighting syntax/style
    issues and providing informative warnings. The SwiftProjectTemplate repo
    includes a .markdownlint.json that silences some common
    warnings about style that occur when writing a more compact style of
    Markdown (which I’ve found AI agents like to use).

    💻 iTerm2

    VSCode and macOS have their own terminals for entering commands, but
    once the scrollback buffer fills up the terminal starts jumping around
    and behaving oddly. If you’ve got a long-running Claude Code session you
    will encounter this highly annoying bug. I prefer to use iTerm2, which has superior configuration,
    customization, and scrollback buffer options than the built-in macOS
    Terminal. Increase your scrollback size to something huge like 500,000
    lines (or unlimited) and enjoy using the terminal again!

    🔨 Xcode

    I tend to prefer using the latest Xcode tools and Swift version, so
    by default (as of this writing) the SwiftProjectTemplate will target iOS
    18.0, Xcode 15.4, and Swift 5.10. I find it useful to use the latest
    tools, especially when creating a new project! However, I included the
    flexibility to configure different versions for those with specific use
    cases.

    🗂️ GitHub

    SwiftProjectTemplate automatically configures a GitHub PR template
    and CI workflow. It’s great having a consistent format for one’s pull
    requests, and it serves as a good reminder to follow best practices when
    merging code. (You did remember to test your code, right?) The CI
    workflow leverages a suite of scripts that are part of the repository
    and make the sometimes complicated CLI commands easier. It should work
    out of the box and SwiftProjectTemplate will generate a minimal iOS
    project with tests that should build and pass the full CI suite of
    quality gates.

    🤖 CLI Scripts

    The repo contains a ./scripts directory with helper
    scripts for common CLI operations (build, test, lint, format), as well
    as a Git hook for pre-commit validation, and a “preflight” script to
    easily do an automated validation on-demand. This is also where the
    setup.sh script lives, which bootstraps one’s project.

    The really cool script though is simulator.sh which is a
    helper tool for the complicated xcrun simctl command–which
    I can never remember how to use, and has complicated arguments. This
    script makes it easy to find which simulators are available (by device,
    OS, and arch), as well as configure the default
    simulator to use for app tests and UI tests. It will write out a
    simulator.yml config file in the root of the project, which
    the test.sh and ui-test.sh scripts will read
    (via yq) in order to execute tests using one’s preferred
    simulator!

    I have found this to be a real time saver, especially when
    configuring one’s GitHub CI workflow, as the simulators available on the
    GitHub runner might be different from what are in your local
    environment.

    🤖 Collaborating With an AI
    Agent

    One of my favorite ways to leverage AI agents is building automation
    infrastructure–especially CLI scripts. I am no expert on
    bash, awk, sed, and the myriad of
    obscure CLI tools with their myriad of complicated arguments and
    configuration options. What once might have taken me hours of googling
    to get a basic script working can now be accomplished in minutes, and
    achieve a sophisticated and user-friendly CLI command (complete with
    --help documentation and clear, verbose arguments, and
    informative feedback).

    I’ve been using Claude Code for a while because I am partial to the
    CLI interface, and it doesn’t tie you to any specific editor.

    Using Claude I’ve been able to easily set up GitHub workflows.
    Leveraging the gh CLI tool to debug workflow issues reduces
    the amount of trial-and-error commits and workflow runs–a time consuming
    and clunky way to debug one’s CI.

    🪄 Using Xcode’s Project
    Wizard

    SwiftProjectTemplate will generate a minimal iOS app–it doesn’t
    really do much. If you want a more fully-featured jumping off point I’d
    still recommend using Xcode’s new project wizard. Turn off the “Create
    Git repository on my Mac” option and then copy the generated files over,
    preserving your repository’s existing folder structure.

    🚀 Contributing to the
    Developer Community

    What started as a personal productivity tool has become something I’m
    excited to share with the broader iOS community. By turning
    SwiftProjectTemplate into a GitHub Template Repository, any developer
    can bootstrap a fully-configured professional iOS project in
    minutes.

    The real win isn’t just individual time savings—it’s raising the
    baseline quality for iOS projects everywhere. When setup friction
    disappears, developers spend more time on what matters: building great
    apps. New developers get professional-grade tooling from day one, and
    experienced developers can focus on innovation rather than
    infrastructure.

    There’s also an environmental consideration that’s increasingly
    important: AI resource efficiency. Rather than every
    developer burning through thousands of AI tokens recreating the same
    project setup, we can solve it once and share the solution. As AI
    becomes central to development workflows, being thoughtful about when
    and how we use these computationally intensive tools matters for both
    cost and carbon
    impact
    .

    Setting up a professional iOS project used to mean hours of
    configuration before writing your first line of app code. Now it takes
    15 minutes—and you only need to figure it out once.

    Ready to try it? Check out SwiftProjectTemplate
    and start your next iOS project the right way.


    Nicholas Hart is a software engineer and technical writer passionate
    about sharing knowledge and helping others learn. You can find more of
    my work at:


  • The Manager Who Never Stopped Coding: My Next Chapter

    The Manager Who Never Stopped Coding: My Next Chapter

    Labor Day Reflections

    Labor Day has come and gone, school has started, and Summer is over
    (even though we haven’t hit the autumnal equinox just yet). This was a
    special Labor Day this year because my unemployment insurance ran out.
    I’ve had a few job opportunities nearly go to an offer, but am still on
    the hunt after 6 months.

    The job market for a software engineering manager is rough–tougher
    than I’ve ever seen it. I’m starting to apply for individual contributor
    roles and contract/consulting roles, just to broaden my options.

    Rediscovering My Love for
    Code

    I successfully launched Sonos’ first B2B SaaS product last year, but
    I didn’t spend as much time writing code as I would have liked. I’m a
    great manager, enjoy coaching, and helping my employees grow their
    careers, but I also love to write code. In my last role I had to spend
    much more time managing–not just my team, but filling in for a busy (or
    missing) Product Manager, and coordinating with stakeholders across
    business units. While I was able to learn a new tech stack sufficiently
    to review code and guide technical decisions, I had a humbling moment in
    a recent interview where I struggled to build an app from scratch.

    As I’ve been working on personal software projects and exploring AI
    agents I’ve enjoyed learning tech stacks like Ruby/Rails, Flutter,
    deepening my understanding of Typescript, and getting up to speed on all
    the latest in iOS development. I’ve done more personal coding in the
    past few months than I have over the prior nine years as a manager.

    I’ve realized that I love technical leadership and I can use my
    skills to help move a team forward as an individual contributor. I’m now
    considering both management and senior IC roles. For IC roles I’m
    focusing on iOS and mobile, which is still my “first love” in
    programming–and where I think I can best demonstrate my technical
    expertise when it comes to a coding interview.

    The “Yay! Code!” Philosophy

    While iOS is still my preferred stack, one thing I have demonstrated
    over the course of my career is that I can pick up any new tech stack
    required. When I first started mobile development it was on Symbian. In
    college I learned how to code in Ada. My first AI code was written in
    Lisp. When I developed Windows apps it was using C++ and COM. I’ve
    delivered apps for Windows, Mac, Linux, iOS, Android, frontend, backend,
    and firmware. I’m what one of my former mentors referred to as a “Yay!
    Code!” kind of engineer. When presented with a new technology I love to
    dive in, learn how to use it, and deliver something great.

    This is such an exciting moment in tech with the rise of AI and
    agentic coding. With an AI agent as a partner (sort of like a junior dev
    with an encyclopedic memory of reference material), it is easier than
    ever to pick up a new tech stack. AI can’t write an app by itself, but
    it can help with some of the tedious boilerplate and “plumbing” code. It
    makes for a helpful SDET, which can help automate your processes, write
    helper scripts, and set up your CI/CD workflow. It’s like having a
    junior pair programmer at your side. I don’t know about these “10x”
    coding claims I read about, but AI can certainly help an experienced
    software engineer/architect leverage their expertise and deliver much
    faster.

    Leading Through Change

    The other interesting thing about this period is how rapidly the
    industry is changing. People have all sorts of predictions about the
    direction things are heading, whether there’s a bubble about to burst,
    etc. The one thing I know for certain is that we are in a “VUCA” period
    (Volatility, Uncertainty, Complexity, and Ambiguity). I have led teams
    through periods like this in the past–from the rise of broadband
    Internet, to the ubiquity of mobile computing, plus cloud computing
    connecting it all. Whether as a manager or a seasoned engineer I have
    the experience, empathy, and resilience to help lead teams through the
    quickly changing landscape.

    What I’m Looking For

    My next role needs to be about the opportunity, not the title. I am a
    technical leader and I like to be close to the code. I want to be
    inspired by the company culture and the people I work with. I want to
    build new experiences that solve problems for customers. I love mobile,
    but understand that great mobile experiences extend beyond the
    phone/tablet and require deep integrations with other systems. I don’t
    want to be held back by platform limitations–I want to dive in and add
    new features to a backend system to unblock my team. If this sounds like
    the kind of manager or staff/principal engineer you need on your
    software team, I’d love to connect!

  • The Fire Ruby Cocktail

    The Fire Ruby Cocktail

    A Smoky and Spicy Twist on a Classic Cocktail

    I realize I haven’t posted any cocktails yet! That’s one thing I used to do on my old company’s #spirits-chat Slack channel and kind of miss. This is a cocktail I haven’t had in a while because I’ve been out of Scrappy’s Fire Tincture for a little while.

    Inspired by The Last Word

    It evolved from The Last Word Cocktail, which is one of my favorite classic recipes. It’s got an herbal bitterness from the Green Chartreuse, a bit of sweetness from the maraschino liqueur, and is a bit boozy without being too harsh. Replace the gin with mezcal to add a smoky character, and then add several dashes (or to taste) of the aforementioned Scrappy’s Fire Tincture for some heat.

    I happen to use locally-made Cherry Liqueur from Scratch Distilling which has a natural cherry color that overpowers the normally greenish-tinged cocktail. Thus, we have what I call the “Fire Ruby” (an homage to the Emerald cocktail at Thai Ku).

    I changed the proportions from the classic formulation and used equal parts “Chartreuse”, cherry liqueur, and lime juice. I find typical maraschino liqueur to be a touch sweet, so I like to dial it back for cocktails like this, or others in the vein of The Last Word. The Scratch Distilling version is already a bit less sweet and more cherry flavored, so you could stick with equal parts mezcal and cherry liqueur if you pick up a bottle and want to amp up the cherry flavor.

    Classic Chartreuse has been in short supply ever since the pandemic, but there are lots of great alternatives out there. One of my favorites is
    Faccia Brutto Centerbe, as well as Pagès Verveine du Velay Verte, but this time around I tried a new one: Luxardo Del Santo, which is a very reasonably priced alternative (and has a gorgeous bottle).

    For mezcal, I like Trader Joe’s brand–it’s a good price and works great for cocktails. If you like your cocktails a bit more boozy, turn the mezcal up a notch.

    The Recipe

    • 1 oz mezcal
    • 3/4 oz Scratch Cherry Liqueur
    • 3/4 oz “Chartreuse”
    • 3/4 oz fresh lime juice
    • a few dashes (or several, if you like it hot) of Scrappy’s Fire Tincture

    Shake over ice, strain, and serve up!

  • Automating Job Applications with Markdown: From 60 Minutes to 20 Minutes

    Automating Job Applications with Markdown: From 60 Minutes to 20 Minutes

    Who This Is For: This workflow is designed for developers and technical professionals who are comfortable with command-line tools, enjoy working in code editors like VSCode, and who prefer markdown for writing (or are willing to give it a try). If you’re already using git for version control and don’t mind a bit of setup for long-term efficiency gains, this approach could save you significant time during your job search.

    Introduction 💡

    Job applications are tedious. Between customizing resumes, writing cover letters, tweaking formatting, and tracking applications, I was spending hours on administrative work instead of finding and responding to great opportunities–or working on side projects which I find infinitely more interesting.

    A little while ago I wrote a blog post on writing with markdown, which has greatly sped up my writing process. I’ve been using it for several weeks now and have made a bunch of automation improvements which enable me to quickly create a job application, customize a resume, draft a new cover letter, and track each application’s progress.

    I also took this opportunity to give Claude Code a test drive and see how it could help me build out some new automation scripts. In the past I’ve found agents like Cursor to be too aggressive–cranking out code faster than I can wrap my head around it. If I’m trying to learn something I want to go slow, ask questions, and understand what’s being built. Agents can’t reason but they’re good at replicating patterns, so I want to make sure it stays on track. (I’ll write more on Claude Code later–but so far I really like it!)

    The result of this collaboration is my new workflow, which I wanted to share with others: Markdown Writer. It’s still a work in progress, but if you like working in an IDE and are comfortable with a CLI you might find this a good way to manage your job applications.

    Why not use existing job tracking tools? TBH, I didn’t even research what’s available–I just knew I wanted to stay in my IDE where I’m most comfortable and productive. As developers, we often build our own tools not because existing solutions don’t exist, but because we have specific workflows and preferences. I wanted something that felt like coding: version-controlled, scriptable, and integrated with my daily development environment. Plus I wanted a small project to experiment with AI.

    Get Set Up ⚙️

    I use VSCode because it has great integration of file/project navigation, editing, helpful extensions, terminal integration, key bindings, snippets, and custom command integration. However this will also work with your favorite code editor and either zsh or bash in your terminal.

    This project is available as a GitHub template repository, making it easy to create your own private copy with one click. Simply visit the Markdown Writer repository and click “Use this template” to create a new repository in your GitHub account.

    If you prefer to clone and experiment first, you can use the repository directly:

    git clone git@github.com:nickhart/markdown-writer.git

    However, for ongoing use, I recommend creating your own repository from the template so you can customize it and track your applications privately. When there are updates to the main Markdown Writer repository, you can use the included script (scripts/sync.sh) to copy updates from the upstream repository to your own, or manually copy specific files you want to update.

    Requirements 📋

    Installing ⬇️

    git clone git@github.com:nickhart/markdown-writer.git
    cd markdown-writer
    ./setup.sh

    NOTE PDF formatting is supported, but requires installation of a LaTeX package. Out of the box Markdown Writer works great for creating DOCX files.

    Configuring 🔧

    Edit .writing.yml with your information. You can see an example .writing.yml here.

    Edit your resume and cover letter templates:

    • templates/resume/default.md
    • templates/cover_letter/default.md

    If you wish to customize your document formatting you can edit the styles in the files located below. Be sure to modify the standard styles (Heading, Heading 2, Body, etc…), then save the changes to reference.docx. Pandoc will use these reference files and use the styles in them when generating your formatted resume or cover letter.

    • templates/resume/reference.docx
    • templates/cover_letter/reference.docx

    You should now be ready to go. The system supports multiple resume templates. For many people “default” might suffice, but I find myself applying to a few different kinds of roles and have one tailored more towards mobile, frontend or fullstack… so I have resume templates with each of those names.

    Workflow 🔄

    Applying To a New Job 📝

    When I want to apply to a new job from the terminal I run

    job-apply Acme "Engineering Manager" default "http://acme.com/jobs/engineering-manager/1234"

    Or if I want to use a specific resume template other than default:

    job-apply Acme "Engineering Manager" fullstack "http://acme.com/jobs/engineering-manager/1234"

    This creates a new job application in the applications/active/acme_engineering_manager_20250624 directory. It copies my “default” resume template and standard cover letter and performs the variable substitution using my .writing.yml. It downloads the job description at the provided URL and saves it as an html file (job_description.html). It creates a metadata file (application.yml) which contains the company name, role, job description URL, and date created.

    Then I go in and tweak the resume as needed (perhaps just the title, maybe the intro blurb), and then crank out a few brief paragraphs for the cover letter. Usually I want to customize the intro to the cover-letter, but often I’ve already got some good content from prior cover letters which addresses particular needs/requirements in the job description. The organization of the applications makes it super easy for me to find a prior cover letter, lift a few sentences and add them into my new cover letter.

    Then I run job-format acme_engineering_manager_20250624 and it automatically formats my markdown resume and cover letter into DOCX format, using reference template files with my preferred styles and page format. The formatted versions go into a formatted subdirectory of the application. The .gitignore automatically excludes the formatted docs from being committed–but if one wished they could tweak that and commit the formatted files too.

    From here it’s a matter of uploading the DOCX files to the job application and filling out the rest of the application information.

    Some applications require some essay-style questions, in which case I add another markdown file to the application folder (eg: application_questions.md) and use my same editing process. I don’t bother formatting these into DOCX but it’s nice to have a record of my responses and then it’s easy to copy/paste them into the application form.

    Submitting and Tracking the Application 📤

    When I’m satisfied with the application I have a helpful command to commit it to my repo:

    job-commit acme_engineering_manager_20250624

    Once I’ve submitted the application, and as it moves through the review process I have a command to update its status:

    job-status acme_engineering_manager_20250624 submitted
    job-status acme_engineering_manager_20250624 interview
    job-status acme_engineering_manager_20250624 offered
    job-status acme_engineering_manager_20250624 rejected

    Each of these statuses has its own sub-folder inside the applications folder in the project root. The job-status command moves the application from one folder to another and updates the status in the application.yml metadata file.

    If I get to the interview stage (w00t!) I take notes in a markdown file which I keep in the application’s folder, eg:

    applications/
      interview/
        acme_engineering_manager_20250624/
          recruiter_notes.md
          hiring_manager_notes.md
          interview_loop_notes.md

    I also have a job-log command which will show a summary of all my applications, or just ones in a certain status. Right now the summary is terse, but I intend to make it a bit fancier in case someone in the state unemployment office decides to challenge me. It will be trivial to take the metadata and generate a log of each job application in DOCX format to prove I’ve exceeded their “three job activities a week” requirement.

    VSCode Integration 🛠️

    I mentioned in my prior post about how I like to use VSCode for my markdown writing. For those who are also using VSCode it will recommend some extensions that I find handy:

    • Markdown All in One
    • Code Spell Checker
    • markdownlint
    • Word Count
    • YAML

    The VSCode configuration adds some helpful settings for Markdown and YAML editing, as well as allowlisting some common words that the spell checker might flag.

    It also adds some commands to the command palette. With a simple cmd-shift-p to open the command palette, select Run Tasks, and choose one of my commands like Create Job Application. It’ll prompt me for the company name, role, which resume template (or use default), and the URL for the job description. It’ll run the command in a terminal and show me the output!

    Wrapping Up and Next Steps 🚀

    In my last post on this topic it was taking me an hour to do what now takes me 20 minutes–and most of that time is me thinking about what I want to write and entering it into a markdown file. I still only apply to a few jobs a day, but I can focus on applying to the roles that really interest me, take the time to craft a thoughtful cover letter, and then have more time to work on my other projects or write a blog post.

    I will continue to use the Markdown Writer to craft my job applications. I also use it for blog posts and format the results into HTML which I can copy/paste into WordPress. No doubt I will continue to refine this aspect of my writing workflow.

    And if you’re curious about some of the other features I’m planning for my job application workflow, take a look at the TODO!

  • 5 Ways AI Helped Me Handle My Mother’s Passing

    5 Ways AI Helped Me Handle My Mother’s Passing

    AI and End of Life

    This article is not about Skynet and AI ending all life on Earth. 😂

    I recently lost my mother. And my job. It’s been a stressful and difficult time, and something I had never really prepared for. I had lots of questions and tasks: managing her estate, dealing with her taxes, dealing with my taxes, organizing her contacts, planning a celebration of life, preparing to livestream the celebration, and even figuring out what I wanted to say for a eulogy.

    As an AI enthusiast I instinctively turned to AI to help me navigate these many activities and challenges. I found AI to be an invaluable tool. I’m going to detail how I have been using it over the past few months to assist with end of life tasks.

    Data Mining for Contacts 🗃️

    As I began planning a celebration of life I wanted to make sure I invited all of my mother’s friends and connections. She wasn’t very organized about her contacts and addressbook—some were in her phone, some were in an email account she shared with my late father, and others were in her gmail account. Still more were scribbled on various notes throughout her office 🤦‍♂️.

    She corresponded with many people who weren’t recorded in her contacts/addressbook, so I knew I needed to scan her emails to find email addresses of personal contacts. I exported and downloaded all of her emails from both accounts, and exported her iPhone contacts. Her MBOX files were gigabytes of data so I knew I couldn’t just upload them to ChatGPT and expect AI to data mine it for me.

    I’ve been a Python developer since before the turn of the century, and it’s one of my favorite tools for processing and transforming data. MBOX files and email headers aren’t that complicated to parse, but I wanted to experiment with AI and see if it could speed up my development process.

    I asked ChatGPT for its help to write a Python script to process the MBOX files, look for email addresses and store them in a SQLite DB. I also wanted to record some contextual metadata with each occurrence of an email address. Was it from a sender or to a recipient? Were there telltale signs of a listserv in the email headers? How many interactions were there with each email address? I chose SQLite because it’s simple and fast for querying the data (and I wasn’t yet sure what I wanted to query).

    I then made a second script to process the SQLite DB and filter for email addresses that matched certain criteria. The script was able to parse a separate list of contacts from an addressbook CSV file, cross reference any email address with it and fill in the person’s name if it wasn’t parsed from the email. And then it output a new CSV with each contact, their first and last name, how many occurrences were found, and whether the address was categorized as personal or listserv. The script also had some filtering parameters to limit the output to only personal addresses, or require a minimum number of occurrences.

    Along the way I found discrepancies and anomalies in the output. I worked with ChatGPT to refine the scripts, for instance when I discovered a pattern of email addresses that were re-sent through yahoogroups.com (eg: someone%40comcast.net@yahoogroups.com).

    Eventually I arrived at a tool that worked pretty well for my needs. It was able to sort through gigabytes of data and arrive at a list of about 160 contacts which appeared to be real people with whom my mom had interacted with online over the past 25 years. This list became the basis for the invitations I would later send out for her celebration of life.

    I’ve published my ContactsScraper on GitHub in case anyone else may find it useful.

    Financial Planning 💸

    DISCLAIMER: Talk to your attorney and accountant/tax preparer. Do not rely on AI to make any legal or financial decisions.

    I inherited a small IRA from my mother, so had lots of questions about what to do here. What is a required minimum distribution? How much is it? What would this do to my taxes? How much debt could I afford to pay off without bumping myself into another tax bracket? Can I afford a new roof for my house? ChatGPT helped me answer a bunch of these questions and model several different scenarios. Then I called my accountant and discussed my plans with her and she confirmed what I had modeled.

    I provided as much specific information as I could about my finances and my mother’s IRA to ChatGPT. I’m not going to post any of that information here or any of the results, for obvious reasons. However, I found this to be a valuable process.

    As I iterated on the financial models new questions and considerations came to mind. How much interest am I paying on this chunk of credit card debt? How much in additional taxes will I pay by taking a larger IRA distribution, and how does that compare to the interest saved? What if I underpay my taxes? Below are some examples of prompts that I used to figure out how best to use this modest windfall.

    Prompt 1: Basic IRA Withdrawal vs. Credit Card Debt Tradeoff 💬

    “I have an inherited IRA worth $100,000 and $50,000 in credit card debt at 19% interest. I’m considering taking a distribution from the IRA to pay off the debt. What are the tax consequences of taking out $50,000 in a single year? Should I spread the withdrawals over multiple years to reduce the tax impact?”

    Prompt 2: Modeling Partial Withdrawal Strategy 💬

    “Assume I’m in the 22% federal tax bracket. If I take $25,000 from my inherited IRA this year and another $25,000 next year, how does that compare (in terms of taxes and interest saved) to taking the full $50,000 this year to eliminate my high-interest debt immediately?”

    Prompt 3: Safe Harbor and Withholding Adjustments 💬

    “If I take a $40,000 distribution from my inherited IRA and don’t adjust my withholding, could I owe an underpayment penalty? What’s the safe harbor threshold for avoiding a penalty, and how might I adjust my estimated tax payments to stay in the clear?”

    This sort of financial modeling is something I usually try to do myself with spreadsheets. Depending on the complexity and my familiarity with the topic it might require an hour of research before I even start writing the spreadsheet. Then as I enter data and model the answer I’ll spend hours more tweaking the spreadsheet columns, cell formatting, formulas, and trying to build a model that would help me visualize and understand different financial scenarios.

    In less than half the time it would have taken me to build a bunch of custom spreadsheets by hand ChatGPT helped me by generating charts and graphs, as well as asking clarifying questions that helped me provide better input. ChatGPT was like a financial planner that helped me get hands on with exploring various options.

    Creative Support ✍️

    “A eugoogalizor, one who speaks at funerals. Or did you think I’d be too stupid to know what a eugoogoly was?” – Derek Zoolander

    I’ve never written a eulogy before. I spoke at my dad’s funeral but aside from an anecdote I had thought of the day before it was largely spontaneous and I didn’t write it down. I wanted to plan a more comprehensive and heartfelt eulogy for my mother’s celebration of life.

    Let me be clear: I did not use generative AI to write my mom’s eulogy. I did use it to give some broad examples of how to approach it, and what elements to incorporate. It helped me establish an outline and plan to fill 5-10 minutes of time. At a high level:

    • Welcome & Thanks
      • acknowledge out of town family and those who couldn’t be here
      • special thanks to volunteers and key providers of support
    • A Difficult Year
      • talk about some of the struggles she’d been fighting through
      • acknowledge her grace and cheerful disposition through it all
    • Her Favorite Things
      • talk about some of the decor and memorabilia and how it relates to her
      • walk through the themes and give an anecdote or two–aim for some levity
    • Who She Was to Others
      • mention her career and impact
      • mention her volunteer work
    • Personal Reflection
      • talk about what she did for our family
      • the values I learned from her
      • how I will remember her
    • Closing
      • toast to her memory
      • invite others to speak

    It’s very personal so I won’t share exactly what I wrote, but the above outline really helped me focus my thoughts. It gave my speech a good cadence/flow, and helped me cover many of the essential memories and stories about her that I wanted to share.

    One thing I will share is my mom’s love of the Mona Lisa. She collected all sorts of artwork and knicknacks featuring that famous smile. I was planning a livestream of the celebration of life and knew I wanted to feature the Mona Lisa. I used Dall-E to generate a version of the Mona Lisa aiming a DSLR camera at the viewer, upscaled it to a large size and then added a speech bubble and disclaimer text, as you can see below.

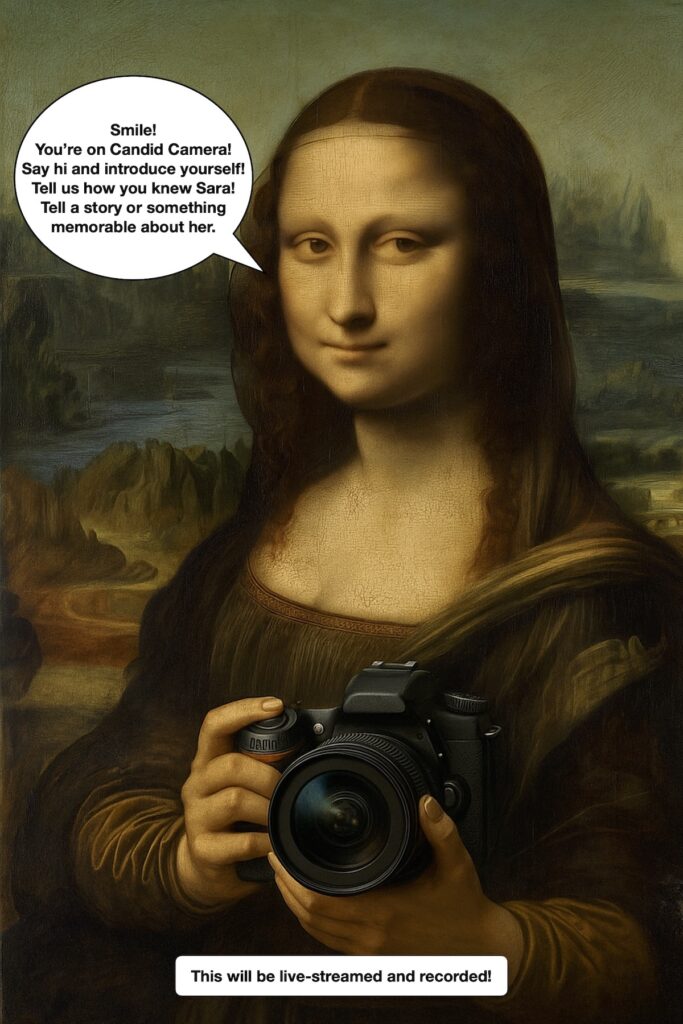
    I then had this blown up into a 24” x 36” mounted poster and propped it up next to the livestream station, which I will elaborate on in the next section.

    Livestream Planning 📹

    I knew many of my mother’s family wouldn’t be able to travel and join us in person at the celebration of life, so I decided to do a livestream and recording of the event. I had never done a livestream before and figured I’d need some near-professional equipment in order to do it right. My kids are interested in becoming YouTubers, so I figured I could invest in some quality equipment for this event and work with them later on their own video streaming content.

    Naturally I turned to ChatGPT to help me plan the livestream.

    I could probably write an entire article about the hardware, software, various accessories, setup, and event planning. I probably will someday, perhaps the next time I use this equipment to livestream an event. This event was a success and the final edited video of the event was greatly appreciated by many people.

    I started by setting a clear goal for ChatGPT: create a professional, reliable livestream setup for your mother’s celebration of life that would both honor her memory and make the event accessible to remote guests. I wanted to not only broadcast and record the eulogies, but also set up a “greeting station” where guests could see a preview of themselves on an iPad and leave a message, story, or greeting for remote guests.

    I gave ChatGPT a list of hardware I already had (like my MacBook Pro and iPad Pro), but asked for assistance choosing a good camera, indoor lighting options, microphone(s), tripod, video encoder, and other equipment. For each item ChatGPT usually offered a few different options and recommendations depending on budget and needs.

    I definitely spent a few hours researching many of the options (particularly the big ticket items like the camera), but eventually settled on a list of semi-pro equipment that I felt would give me the best bang for my buck:

    On the software side of things ChatGPT recommended OBS, an open-source streaming/recording tool which was a breeze to set up and connect to YouTube. For post-production and editing the recorded footage into a polished video I used iMovie. It’s pretty basic, but is free with macOS. I think next time I do something like this I may invest in Final Cut Pro, but as I’m not a pro who does this for a living I think Adobe Premiere Pro is probably overkill.

    ChatGPT even offered to make a “day of” checklist for me to help me configure the whole end-to-end livestream setup. I didn’t bother with this but did ask a few troubleshooting questions (eg: about XLR to TRS microphone conversion) while setting up at the event.

    Overall the event was a wonderful gathering of people and sharing of memories and stories about my mother. I don’t know that many remote relatives tuned in to the livestream, but they definitely appreciated the edited recording I eventually created and shared.

    Post-Production Challenges 🎛️

    A few days later I sat down in front of my MacBook intending to do a little editing and create a version of the celebration of life which I would post to YouTube and share with family and friends. This is when I discovered the audio was terrible.

    I thought I had correctly connected to the in-house AV system using a jury-rigged XLR to TRS converter for the microphone. However it sounded like the only audio that was picked up was from the camera’s built in mic. It captured the sound from the house speakers–as well as any nearby chit-chat, laughter, or applause from guests.

    With a few suggestions from ChatGPT I was able to manually clean up the audio enough that the eulogizers were mostly intelligible:

    • Apply the “Enhance Audio” feature
    • Use the “Voice Enhance” filter
    • Reduce Background Noise (40% worked pretty well in my case)
    • Lower Gain or Volume on Peaks (manually select moments of applause or laughter and reduce the gain)

    I also came up with a shopping list of additional microphones and equipment (like a good XLR to TRS converter) so that next time I livestream an event I would be prepared.

    Final Thoughts

    What I found during this whole process was that AI can not only be a valuable resource for dealing with the variety of unexpected questions and issues that may come up when you have lost someone, but surprisingly I think it helped me cope with the grief.

    I spent a lot of time on my computer working on the tasks detailed in this article–and through it all AI appeared to lend a supportive and sympathetic ear. AI helped me stay focused on the tasks I needed to get done and create a wonderful memorial for my mother.

    What surprised me the most about AI’s capabilities was how natural it felt. It almost felt like a friend on the other side of a chat app who was there to help me figure out how to manage anything that came up–whether it was finances, tech, or how to write a eulogy. Other times AI was simply there to cheer me on and celebrate a small success.

    AI is being incorporated into everything, but I don’t think I’ve seen it used for end of life planning and services. It makes me wonder if there is an opportunity here for a startup.


    I’d love to hear how you have used AI to navigate end of life issues. Do you know of a startup that works in this space? I think this is an interesting and possibly untapped area for AI.

  • Markdown Writing Workflow: How I Write 3x Faster

    Markdown Writing Workflow: How I Write 3x Faster

    The Power of Writing Everything in Markdown First

    I’ve been writing tons of resumes, cover letters, and blog posts lately. Word processors felt cumbersome—too much time formatting, too much repetitive work. Then I realized: why not approach writing like an engineering project?” Instead of jumping straight into WordPress, Google Docs, or Apple Pages, I now write everything in VSCode using markdown.

    Blog posts, resumes, cover letters, interview notes, writing assignments… they all go into markdown first. Then I use Pandoc to convert them to whatever format I need.

    The results? I’m faster, more focused, and my content is way more portable.

    Why Markdown Makes Sense 📝

    I find writing in a word processor to be distracting—there are so many formatting choices. I just want to focus on the content and have a standard format for the output. This is why markdown appeals to me. It’s simple and consistent.

    Perhaps it’s the engineer in me, but I feel like I have more power and control over the structure of my writing. It’s easier to “refactor” the structure of my prose and move ideas around for a better flow.

    Markdown gets all the formatting out of the way. You focus purely on content and structure. The syntax is dead simple: **bold**, *italics*, # headers, - lists, and [links](url) — but nothing more.

    Why VSCode? ⚡

    VSCode helps keep my files organized, easy to find, easy to search, and fast to switch context. It’s a fast, flexible text editor, and extension support for Markdown and other formats is a huge time saver.

    All of my files are organized into folders in a single project. When I’m done writing a resume I can quickly switch to my cover_letters folder, create a new markdown file, copy/paste my boilerplate contact info, salutation, and start writing.

    Also VSCode has a great built-in preview that lets you see how the markdown will render. The stroke of a few keys (Cmd + shift + V on macOS) and you can see the results instantly.

    The Secret Sauce: Pandoc 🔧

    I use Pandoc to do my conversion. It’s a simple command line tool that you can run from the terminal inside VSCode. I used to keep Terminal windows open all over the place to run command line tools, but using the terminal integrated into VSCode helps keep everything organized and in one place.

    Project Structure 📂

    I mentioned using VSCode to keep my files organized. Here’s a rough sketch of my project structure:

    writing/
    ├── blog/
    │   └── formatted/
    ├── assignments/
    │   └── company_x/
    │   └── company_y/
    ├── resumes/
    │   └── formatted/
    ├── cover_letters/
    │   └── formatted/
    └── interviews/
        └── company_x/
        └── company_y/

    I keep the markdown organized into top-level folders (blog posts, assignments, resumes, interviews, etc.) and for interviews and assignments I use sub-folders for each company. Any place I want to generate a formatted version from markdown I use a formatted sub-folder.

    On occasion if I feel the need to do some custom formatting in a wordprocessor I add some notation to the edited filename (eg: resume_company_x_edited.docx) as a reminder not to blow it away by re-generating from the markdown.

    Version Control with Git 📋

    Since I’m treating writing like an engineering project, I use Git to track all my markdown files. This gives me powerful revision history, the ability to see exactly what changed between drafts, and easy restoration if I mess something up.

    VSCode’s Git integration makes this even better—I can see at a glance which files have changes, view diffs right in the editor, and commit directly from the IDE without switching to the terminal.

    I keep a .gitignore file that excludes the generated content:

    # macOS
    .DS_Store
    ._*
    
    # Ignore generated formatted files
    */formatted/
    *.pdf
    *.docx
    *.html
    
    # But keep the reference template(s)
    !reference.docx

    This way my repository stays clean with just the source markdown files, but I can still track my reference templates. The formatted outputs are disposable since I can regenerate them anytime with pandoc.

    The Workflow 🚀

    Here’s what my typical workflow looks like now:

    1. Open VSCode and create a new .md file in the appropriate folder
    2. Write the entire piece without worrying about final formatting
    3. Preview the markdown in VSCode and make sure it looks good
    4. Convert to whatever format I need (HTML for WordPress, DOCX for resumes, etc.)
    5. Proofread the formatted version (check fonts, margins, spacing, etc.)
    6. Upload the formatted version to WordPress, a job application, or anywhere you need it

    I have a bunch of aliases for pandoc that make the conversion process a breeze. Add these to your ~/.bashrc or ~/.zshrc file to make them available in your terminal.

    # HTML for blog posts (clean, WordPress-friendly)
    md2html() {
        pandoc --no-highlight --wrap=none -t html -o "./formatted/$(basename "$1" .md).html" "$1"
    }
    
    # DOCX with reference template
    md2docx() {
        pandoc --reference-doc=reference.docx -o "./formatted/$(basename "$1" .md).docx" "$1"
    }
    
    # PDF via LaTeX
    md2pdf() {
        pandoc -o "./formatted/$(basename "$1" .md).pdf" "$1"
    }

    Each format serves a specific purpose: HTML works perfectly for pasting into WordPress or web platforms, DOCX is what most job applications expect for resumes and cover letters, and PDF is ideal for sharing finalized documents that need to look identical everywhere. You can use PDF for resumes and cover letters, but I have read that some ATS scanners can choke on it, which is why I stick to DOCX.

    Making a Reference DOCX Template ⚙️

    To create a reference DOCX template, start by generating a basic one from any markdown file: pandoc sample.md -o reference.docx. Then open this file in Microsoft Word (or your favorite word processor which can export to DOCX) and customize all the styles you care about: fonts, margins, headings, paragraph spacing, etc. The key is to modify the actual Word styles (like “Heading 1”, “Normal”, “Strong”) rather than just formatting individual text, since pandoc maps markdown elements to these named styles. Save the file, and now every time you use --reference-doc=reference.docx, your converted documents will inherit this formatting. You only need to set this up once, and it works great for making professional-looking resumes and cover letters that maintain consistent branding across all your materials.

    You can also put this file somewhere central like ~/.pandoc/reference.docx so you can easily access it from anywhere. However, for my workflow I like to keep a separate reference.docx in each project folder so I can easily customize the formatting depending on the type of content.

    The Portability Game-Changer 🎯

    The portability of using markdown and Pandoc is incredible. I usually generate my resumes into DOCX format because I think ATS scanners sometimes choke on PDF, but if you want it in PDF it’s just a one line command.

    The learning curve for Markdown is minimal too (although if you’re an engineer you’re already probably familiar with it). If you can remember that # makes headers and **text** makes things bold, you’re 90% there. GitHub has a great tutorial on using Markdown. It’s very handy if you need a quick reference or refresher.

    Future Automation Ideas 🔮

    I’m planning to automate this even further. Git hooks could automatically regenerate formatted versions whenever I commit changes. Imagine pushing a blog post update and having the HTML automatically ready for WordPress!

    I’m also thinking about a simple script that can create new WordPress posts directly from my markdown files and leveraging WP-CLI.

    The best workflows are the ones that get out of your way and let you focus on what matters: the actual work.


    Have you tried writing in markdown? I’d love to hear about your workflow experiments.

  • Did I Write This… or Did AI?

    Did I Write This… or Did AI?

    I’ve been spending a lot of time on LinkedIn lately as I navigate the highly competitive job market. I won’t lie–I have used ChatGPT in my job search. Full disclosure: AI did not write this article. I did. (Dall-E did provide the featured image.)

    Before I dive into AI I want to talk about writing. Not everyone is a great writer in English. I recently received a glowing recommendation on LinkedIn from a former employee for whom English is a second language. Part of me wished he wrote it with typos and all because it might appear more genuine. Except that knowing how AI works I am certain he put some effort into crafting a prompt with details about how he experienced working with me, mentoring, and career coaching. AI spit out the final product, but he gave it the inputs.

    I grew up in the United States in a middle class family where both parents had Masters Degrees in education. My father was a published author. I’ve always enjoyed reading and writing, done well in school and taken creative writing classes in college. I take pride in the fact that I can write well and communicate with the written word–whether it’s an email, Slack message, Confluence page, year end review, or commit message.

    Not everyone is so fortunate. So it seems to me that a tool like ChatGPT can help take some raw input and produce polished output. This can really level the playing field for some people!

    As a job seeker I find ChatGPT to be an invaluable tool. First and foremost I use it to review my cover letter and resume for typos and word choice. It’s like having a collaborative editor. But sometimes there is a little writers block and it can be useful to provide the job description, some notes on how your experience is a good fit for the role, and then take the result and make it one’s own. Much of the time the output sounds too polished, too generic, and too insincere. However, I’ve found it’s a starting point.

    Take the AI-generated content and make it your own. Think of it as a framework and add in your own experiences and wording. In a resume or cover letter nothing will substitute for your own experience and voice.

    This brings me to my last observation. I’ve seen a lot of LinkedIn posts from recruiters and hiring managers to the effect of “if I think you used AI I’m going to reject your application.” I can’t help but think how unfair that is to talented people for whom English is a second language, or who perhaps don’t have the same flair for expressing themselves in writing in English.

    AI is a tool. We’re all still learning how to use it and navigate this radically changed landscape–whether it’s writing code or cover letters. Let’s try to assume good intent. Sure some people will probably use AI to do their homework, but others might use it to help level the playing field a bit and make sure their resume makes it through the scanners… and you never know if that polished cover letter you threw out was crafted with care by a talented writer.

  • Long time no see…

    Long time no see…

    It’s been a while! Got laid off. Mom passed away. And the backdrop? World going to hell.

    My mom had been battling a variety of health issues this past year and at least I had the time to spend with her. Fortunately I had the support of my wife and her family.

    I will give Sonos credit for giving me the time to take her to appointments and be with her when she was in the hospital—but I’d have preferred FMLA to a layoff. (I still think they make great products, FWIW.)

    My wonderful wife and her sisters helped me clean out her co-op. It’s still not done but we made a ton of progress—and we had fun discovering some amazing memorabilia. I can’t wait to share some of it at her celebration of life—at the Paramount Theatre in Seattle! (The featured image is a pair of her boots I found).

    My mom volunteered at the Paramount for many years and I never knew what a community of friends she had built there, as well as at the Opera and Ballet. It’s really special that we’ll be able to remember her at such a gorgeous and historic site!

    For me the Paramount was where I saw my third live concert; my dad took me to see Weird Al Yankovic (don’t ask which tour because it will date me—as will the artists of my first two concerts).

    Anyhow, I’ve never felt like I had time to work on this cobwebsite, but now that I’m job hunting (and reluctant to give my content to LinkedIn gratis) I will try to post here semi-regularly.