My kids are getting in to LEGO so I decided to up the ante with a pretty simple IKEA hack. I bought and assembled the Trofast toy storage unit and covered the top with off-brand baseplates.
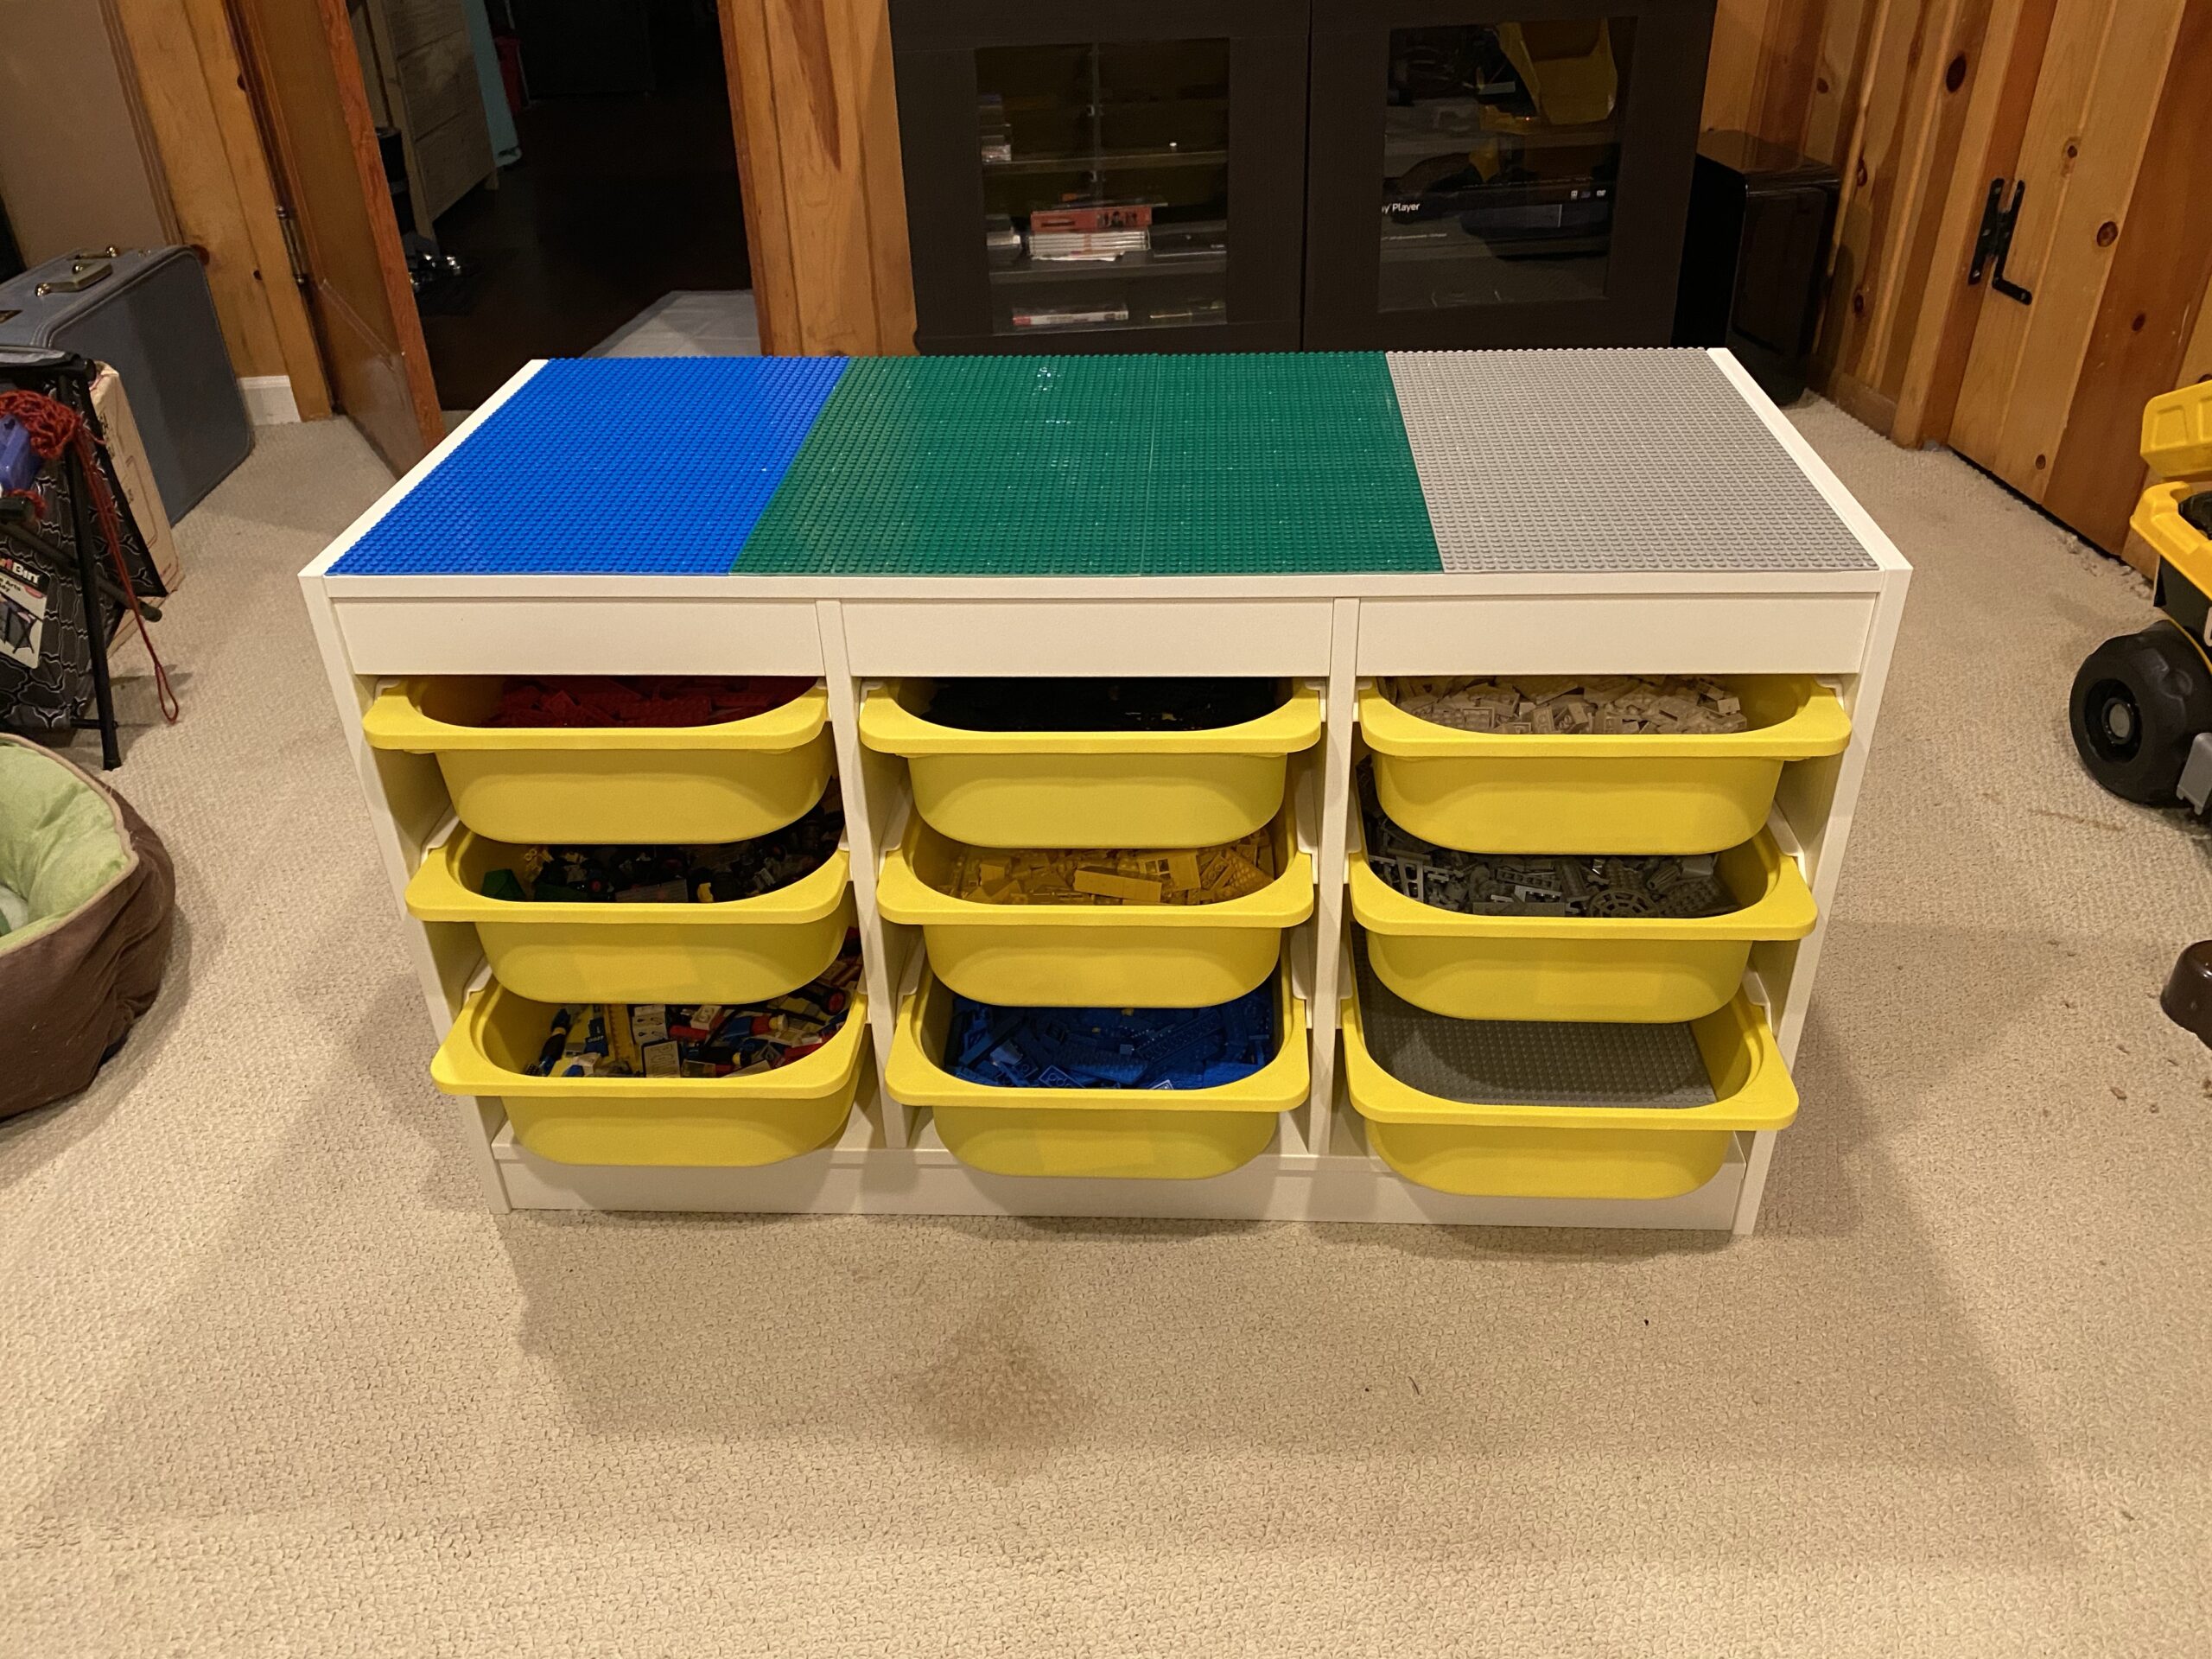
I found some good instructions for cutting the baseplates to fit. It’s pretty easy with a box cutter (use a sharp blade) and a steel ruler. I used some LEGO pieces on the baseplate to act as a guide for the ruler and to make sure I cut in a straight line. I ended up making a pattern of blue (water), green (grass), and gray (concrete/lunar) for the baseplates. I used two blue, four green and two gray baseplates. The vertical panels on the sides of the Trofast are not flush with the top, so I arranged the baseplates to only cover the top panel, not the edges of the side panels.
I figured the glue would stick to the Trofast better if I sanded the finish. I took some coarse sandpaper and spent a few minutes turning that glossy veneer to a matte finish. For glue I recommend using Gorilla Glue. My first attempt was with a glue gun, and it was terrible. The glue hardened before I could get the plates positioned and the glue wouldn’t smoosh flat. It also peeled right off the Trofast and stuck to the baseplates. I spent at least an hour peeling glue off the baseplates.
The top panel of the Trofast is about 37.25″ x 17″ (this is not exact). A 10″x10″ baseplate has 32×32 studs… so the end result is 119×54 studs. If you want to get more creative than I did you can cut almost any pattern you want with your baseplates. There are also smaller 5″x5″ baseplates which would allow you to easily create more intricate patterns (also if you don’t want to cut baseplates you could use them whole and design a 35″x15″ pattern and center it on top of the Trofast.
Follow the Gorilla Glue instructions and make sure the surfaces are clean before you begin. Use a damp cloth to moisten the underside of the baseplate. I used some LEGO bricks to connect the baseplates together, in order to ensure they were positioned correctly and enable building structures across them. I glued two plates at a time by making a rectangular spiral pattern on the Trofast—with the glue inset about 1” from where I wanted the baseplates mounted. I found that if I used too much glue (use thin lines of glue) and got too close to the edge, often some excess glue would seep out from underneath the edge of the baseplate.
Once you have applied the glue and positioned the baseplates, use some bricks to connect to the neighboring baseplates and ensure the whole thing is lined up properly and not askew. Finally put a stack of heavy books or other weights on top of the baseplates and let it cure for 2 hours. Repeat these steps with each set of baseplates until the top of the Trofast is covered.

Sorry I didn’t take more pictures during the cutting and glueing process–but it was pretty straightforward, especially if you have the right glue.